Sequencer Integration
The Vertex Animation Studio integrates with Unreal Engine’s Sequencer for cinematic control of vertex animations.
How to Use VA Animations in Sequencer
Section titled “How to Use VA Animations in Sequencer”Step 1: Create a Blueprint Actor
Section titled “Step 1: Create a Blueprint Actor”
- Create a new Blueprint Actor
- Add a VA Mesh Component to your Blueprint
- Configure the VA Mesh Component with your VA Asset Collection
- Save the Blueprint
Step 2: Add to Sequencer
Section titled “Step 2: Add to Sequencer”
- Open your Level Sequence in Sequencer
- Drag your Blueprint Actor into the level (if not already placed)
- Click the ”+ Track” button in Sequencer
- Select your Blueprint Actor from the list
Step 3: Add VA Animation Track
Section titled “Step 3: Add VA Animation Track”
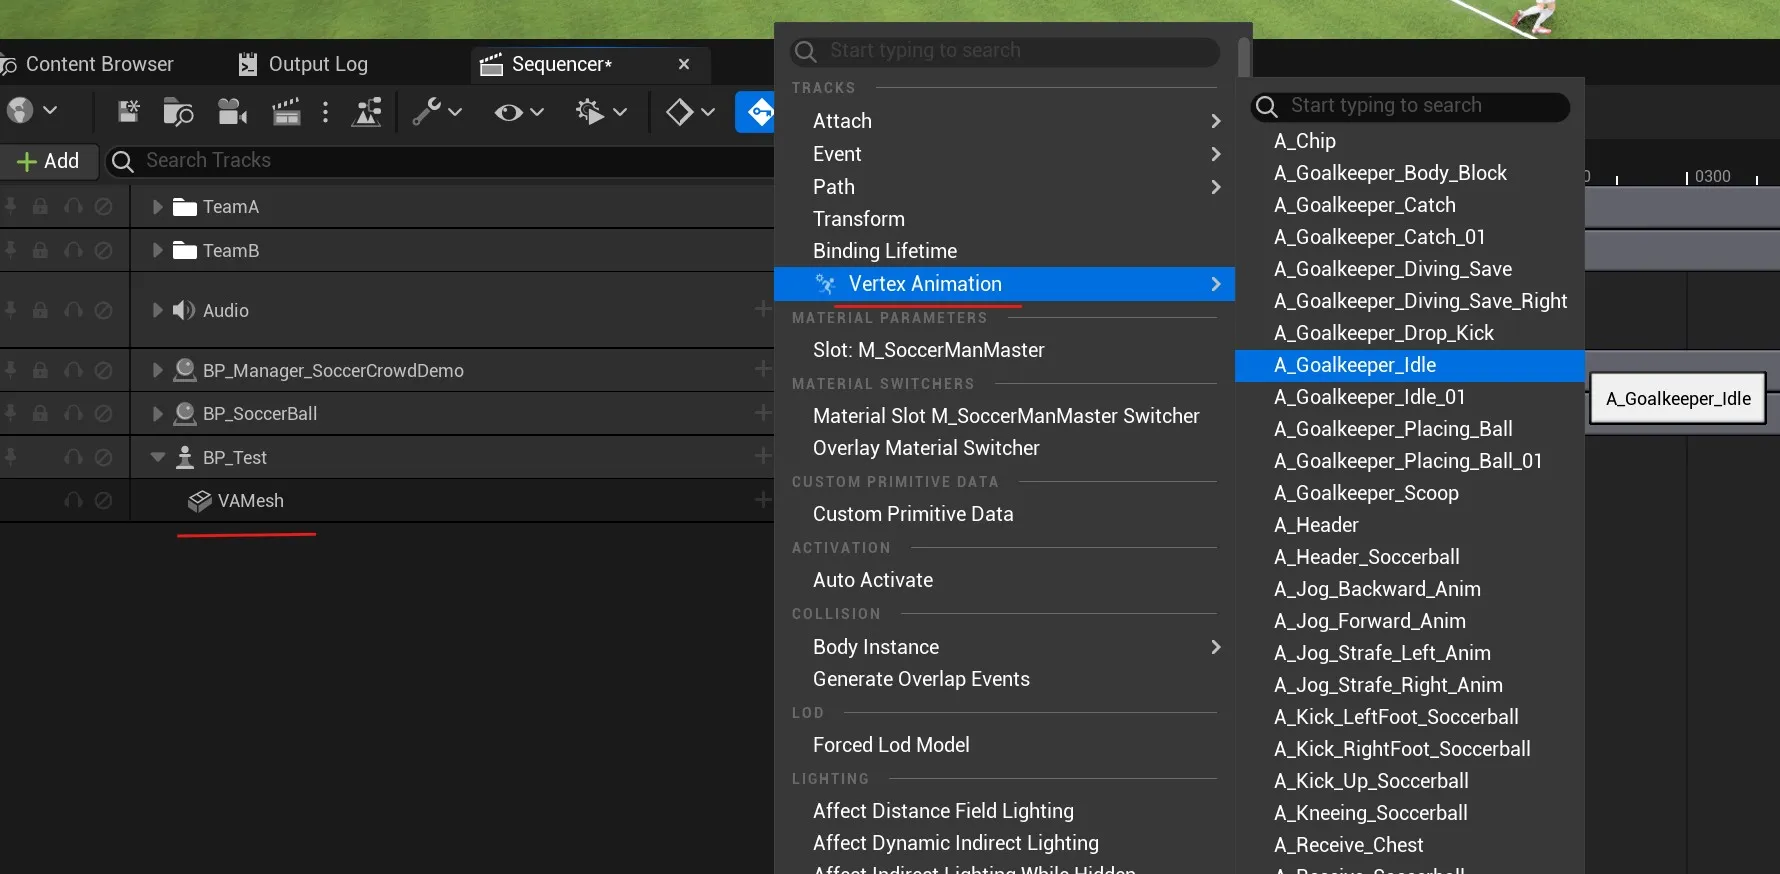
- In the Sequencer timeline, find your Blueprint Actor
- Right-click on the VA Mesh Component
- Select “VA Animation Track” from the context menu
- Select the first animation to add the track
Step 4: Add Animations
Section titled “Step 4: Add Animations”
- Right-click on the VA Animation Track
- Select “Add Animation Section”
- Choose an animation from your VA Asset Collection
- The animation section appears on the timeline
Step 5: Configure Animation Properties
Section titled “Step 5: Configure Animation Properties”
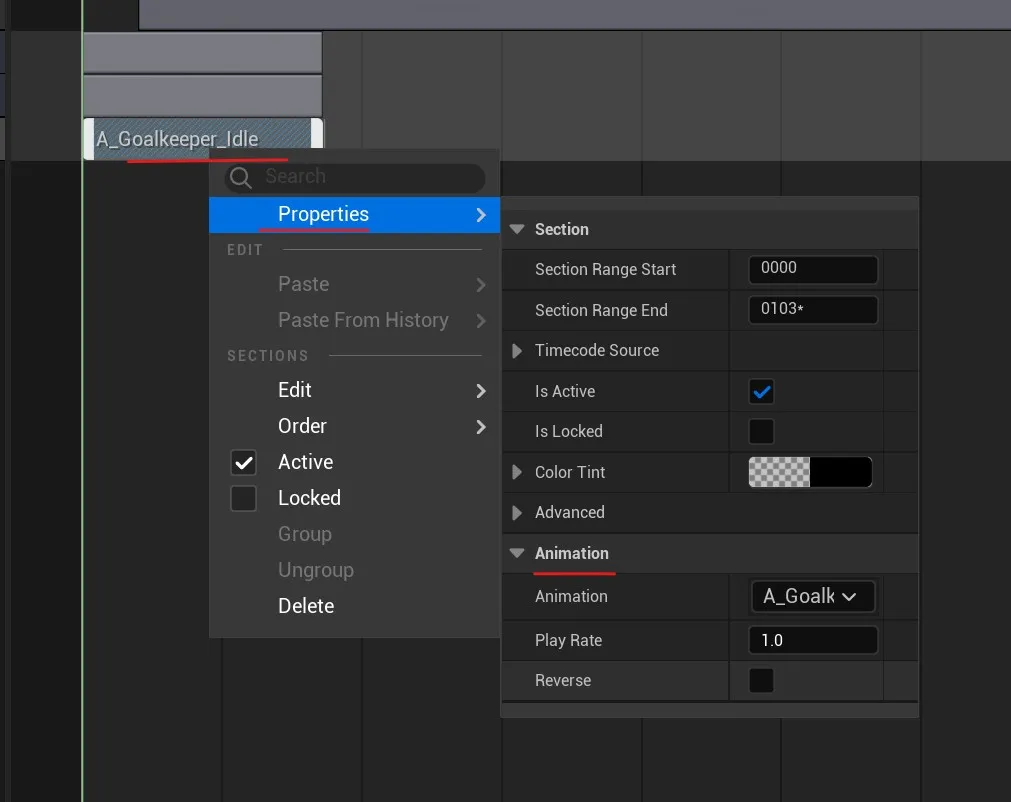
- Right-click on the animation span in the track to open properties
- In the properties popup, you can adjust:
- Animation: Choose which animation to play
- Play Rate: Speed of playback (1.0 = normal)
- Reverse: Play animation backwards
- Drag the edges of the animation span to adjust duration
- Move the span along the timeline to change when it plays
- Animations must exist in the VA Asset Collection assigned to your component
- Use consistent frame rates between your animations and Sequencer project
- If you see jumpiness in playback, disable motion blur in your Post Process Volume by setting Motion Blur Amount to 0

See Also
Section titled “See Also”- VA Mesh Component - Component setup
- VA Asset Collection - Managing animations
- Getting Started - Getting started with the plugin